TrueMail Collaboration Platform
The User Manual
Legal Notice
Copyright © 2012 True Internet.
All trademarks are the property of their respective owners.
Disclaimer: Although all documentation is written and compiled with care, TrueMail is not responsible for direct actions or consequences derived from using this documentation, including unclear instructions or missing information not contained in these documents.
Abstract
The TrueMail Collaboration Platform combines the usability of Outlook with the stability and flexibility. It features a rich web-interface, the TrueMail Web Access, and provides brilliant integration options with all sorts of clients including all most popular mobile platforms.
Several closed source components exist, most notably:
These components, together with several advanced features for large setups and hosters, are only available in combination with a support contract as part of TrueMail Webmail's Commercial Editions.
Alternatively there is a wide selection of hosted TrueMail Webmail offerings available.
This document, the User Manual, describes how to use TrueMail Webmail from a user's view point. It discusses:
-
Outlook integration by using the Windows Client,
-
using the web-interface of the TrueMail Web Access and
-
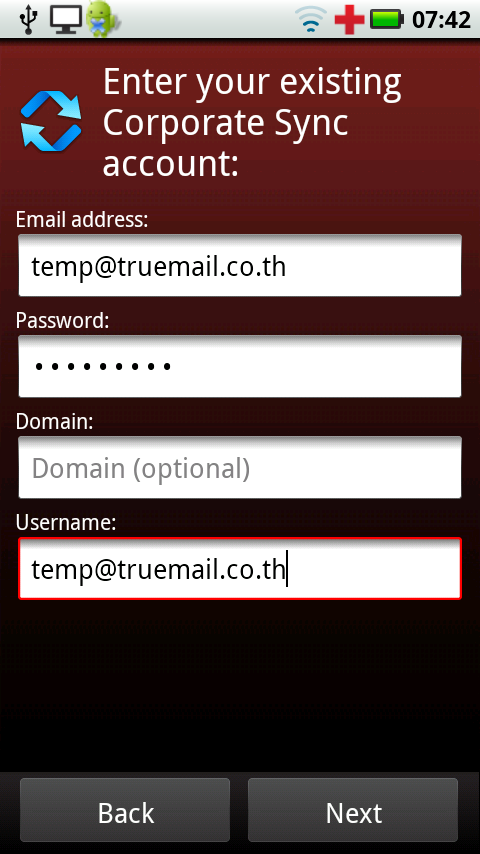
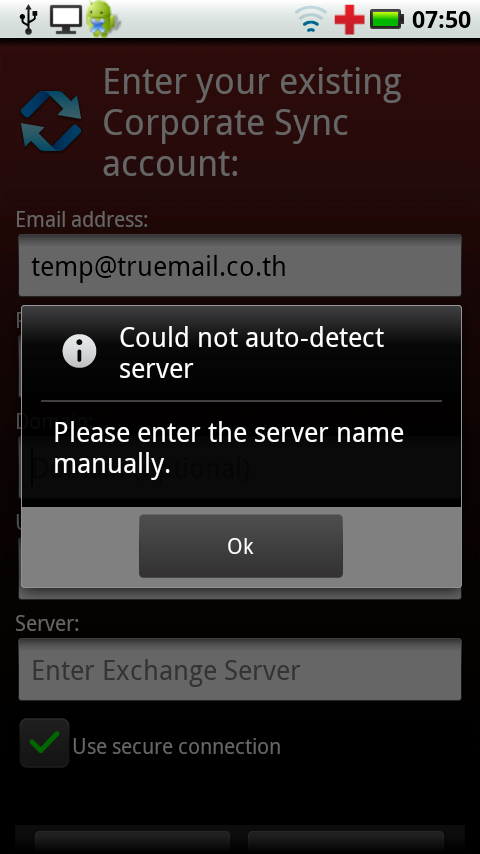
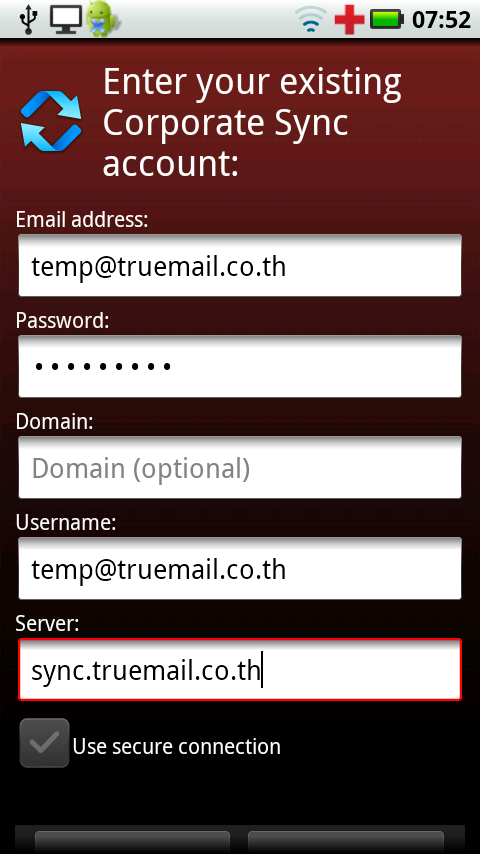
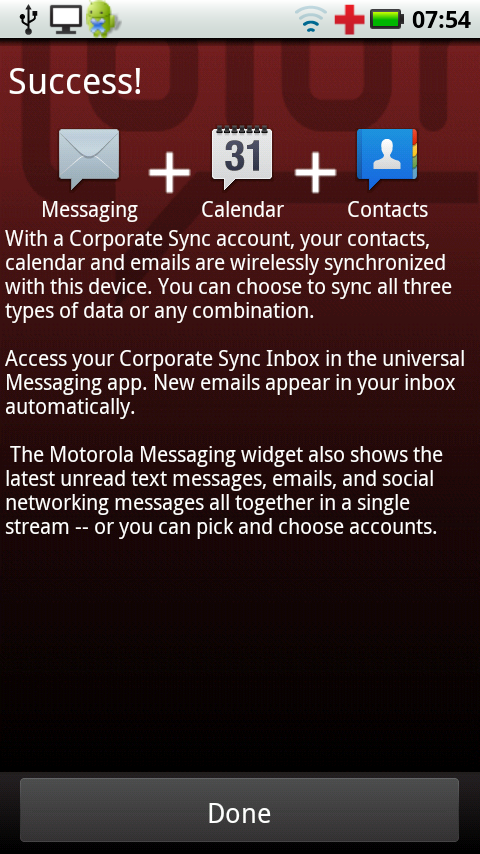
syncing with mobile platforms like: Google Android, Windows Mobile and Apple iPhone.
The TrueMail Collaboration Platform combines the usability of Microsoft Outlook and Exchange with the stability and flexibility of a Linux server. It features a rich web-interface, the TrueMail Web Access, and provides brilliant integration options with all sorts of clients including all most popular mobile platforms.
These components, together with several advanced features for large setups and hosters, are only available in combination with a support agreement as part of TrueMail Webmail’s Commercial Editions.
Alternatively there is a wide selection of hosted TrueMail Webmail offerings available.
This document, the User Manual, describes how to use TrueMail Webmail from a user’s view point.
1.1. Scope of this document
This manual is intended for users of the TrueMail Collaboration platform. Users interact with this platform by several means:
-
the TrueMail Web Access, our web-based groupware solution, and
various mobile platforms like: Google Android, Windows Mobile and Apple iPhone.
Chapter 2. Using the TrueMail Web Access
In this section we describe how to use the TrueMail Web Access, the web-based interface of the TrueMail Collaboration Platform .
In order to use the TrueMail Web Access a fairly recent version of Mozilla Firefox (preferred) or Microsoft Internet Explorer is needed.
Currently the TrueMail Web Access supports the most used features of Microsoft Outlook in a fairly comprehensive way. Yet a web-based interface can never match the functionality and usability of a native client (like Microsoft Outlook).
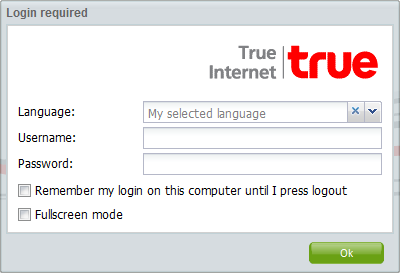
To login to the TrueMail Web Access, point the browser to the URL supplied by the systems administrator. By default this URL will look like:
http://webmail.yourdomain.com/
With regards to the dashboard, some functionality is only available in the portlet.
It is not possible to delete, move, or rename default Outlook folders (like Inbox, Calendar and Contacts).
It is possible to print email and appointments from the WebMail. Simply use the Print button from the toolbar.
Following these steps it is also possible to print calendar overviews of a day, a week or a month.
Just like in Outlook it is possible to resize the panes in the WebMail, allowing full control of the width and height of the workspace in each pane. To do so place the mouse between two panes en drag the pane border to the prefered location.
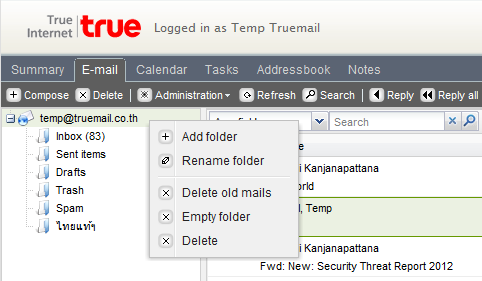
2.2.3. Empty trash items folder
The Trash folder can be emptied by using the right mouse button, and selecting option Empty folder from the context menu. This option is only available from the context menu (accessed with the right mouse button) of the Trash Items folder and the Spam Email folder (if it exists).
When deleting an item in the
Trash folder or the
Spam folder, the item is still temporarily recoverable. Select the
Trash folder or
Spam folder, and use the mouse drag and drop to any inbox folder. As shown in
Figure 2.4, “The soft delete restore window” it is possible to restore all or a selection of the deleted items.
2.2.5. Marking all messages in a folder as read
Marking all messages in a folder as “read” is accomplished by the right mouse button menu option Mark All Messages Read. Please note that when this option is selected, no read receipts will be sent when requested by a sender, even if that option is selected in the settings.
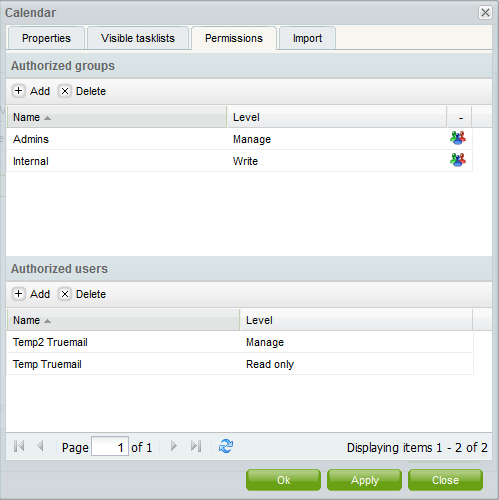
2.3. Access calendars for other users
Just like in Outlook, the WebMail allows sharing permissions to be set on folders.You can manage share folder of an account at:
Calendar-> Administation -> double-click calendar name -> Premissions , as shown in Figure 2.5, “Calendar Permissions”.
Click on the Add button under the Permissions tab.
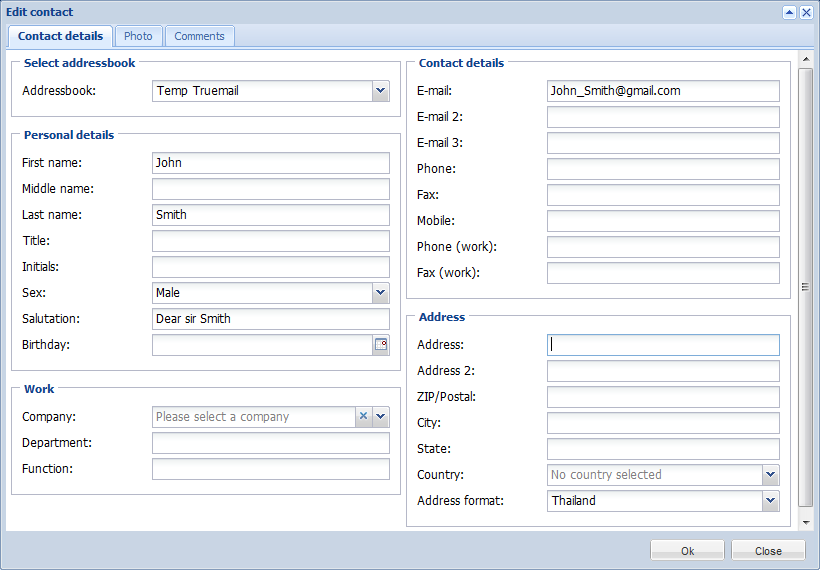
When the Address Book pops up, select the person to give permissions to and click Ok. This contact will then be added to the permissions list.
Please note that this persons' permissions must be changed. As by default the dialog grants no additional permissions.
Click Ok to save and close the permissions window.
2.3.2. Change permissions
Click on the person whose permission needs to be changed.
Now the permissions can be manually set in the bottom part of the permissions window, or one of the preset profiles can be selected from the Profile drop-down menu.
Click Ok to save and close the permissions window.
Click on the person who needs to be removed from the list.
Click on the Remove button.
Click Ok to save and close the permissions window.
2.3.4. Open shared calendars
To subscibe shared folders from the TrueMail Web Access click theYou can manage folder subscriptions of an account at:
Calendar -> click at calendar name. A window as shown in Figure 2.6, “Open Shared Folder” will be presented.
From the dialog shown in
Figure 2.6, “Open Shared Folder” it is possible to either open a single folder (for example the calendar folder), or open a complete folder list of a specific user.
To close an opened folder, use the Close store option in the right mouse button menu.
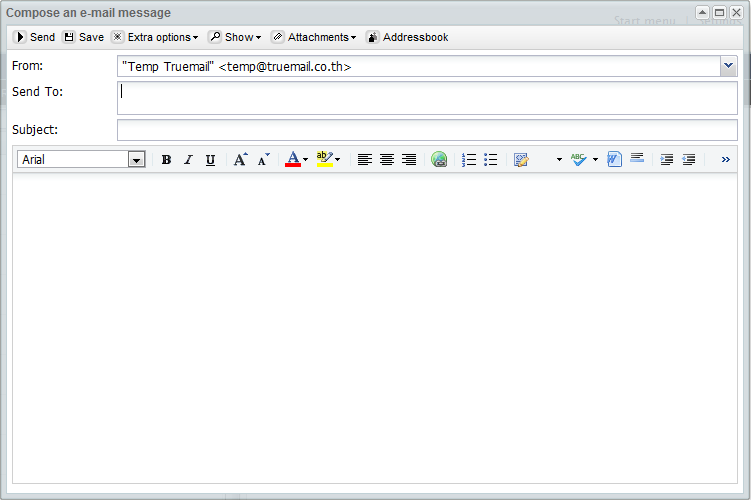
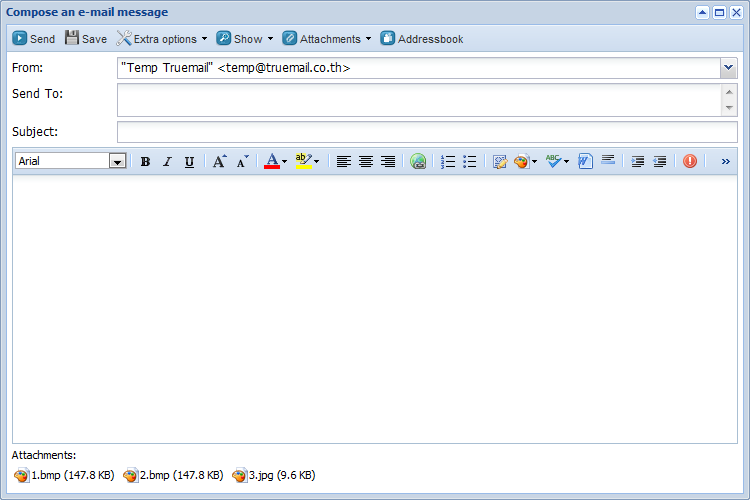
2.4.1. Compose and send a new email
-
-
Attachments can be added to the email by selecting the Attachments button.
Email can be saved by selecting the Floppy disk icon. After a email is saved, it is stored in the Drafts folder.
-
To set a flag that marks the email as important or high priority, click on the Extra options button or Tools icon.
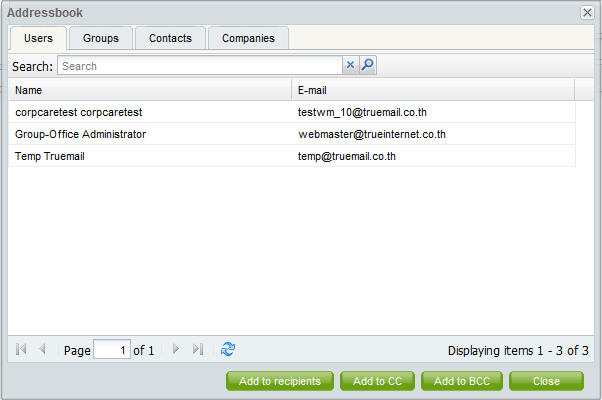
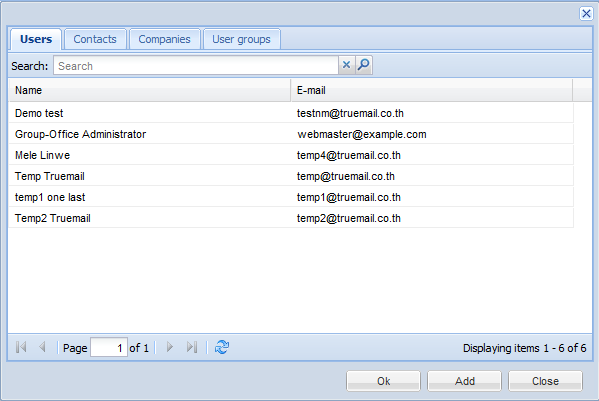
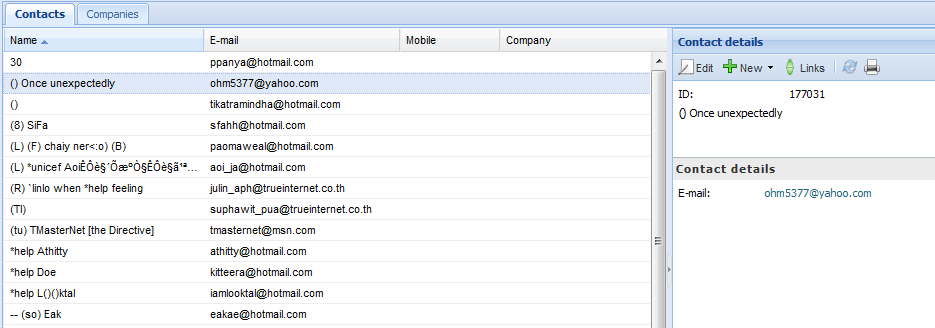
To add a recipient, either add their email address in the TO, CC, or BCC field manually, or select a person from the Address Book. To access the Address Book, click on the TO, CC or BCC button.
When more than one recipient is added, email addresses need to be seperated by a comma (,).
The internal users are shown by default (unless otherwise selected in Settings) in the Address Book (see:
Figure 2.8, “Address Book”). By using the
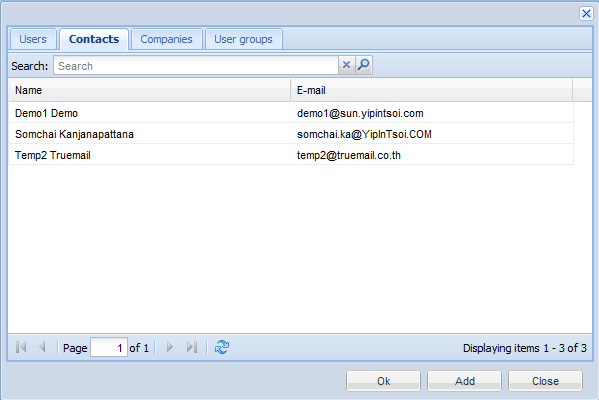
Show names from the: drop-down menu, it is possible to view contacts from either a personal contacts folders, or a Public contact folder. Alternatively, it is possible to search a folder using the search field positioned in the top left of the window.
It is not support to add company-wide defined address lists in the Address Book. Read the TrueMail Webmail Administrator Manual for more details regarding address lists.
2.4.1.1. Automatic email address suggestion or Auto-Complete
When typing an email address or contact information in the
TO,
CC or
BCC fields the WebMail automatically suggests names (a feature often known as
auto complete). The suggestions are listed below the input field (see:
Figure 2.9, “Automatic Suggestions”) and a suggestion can be selected by both mouse or keyboard. The suggestions are based on email addresses and contact information that have been used recently.
It is possible to delete an address from this list by moving the selection to the address in question (by either using the keyboard arrows or by placing the mouse over it without clicking) and then pressing the Delete key. The address is removed, but when it is used again it will show up in the list once more.
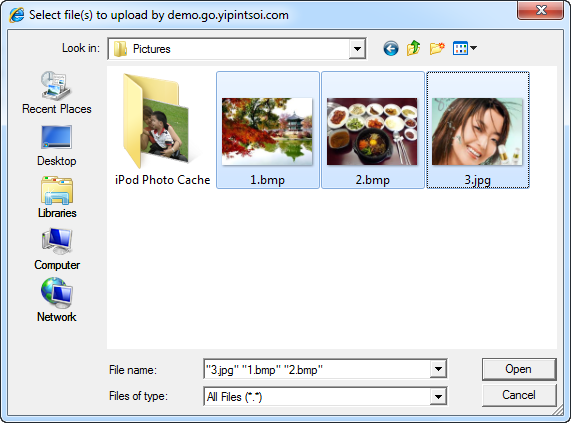
You can attach files to your message by clicking the Attachments button in the Create E-Mail screen. A window will open, which allows files to be uploaded.
From TrueMail Webmail it is possible to upload multiple attachments at once. Prior versions of TrueMail Webmail only allow the upload of one file at a time.
To upload multiple files at once, Java has to be installed in the browser.
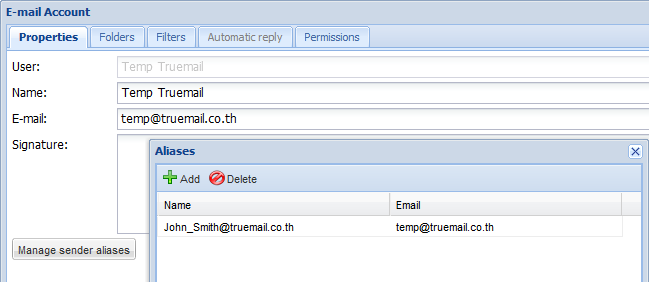
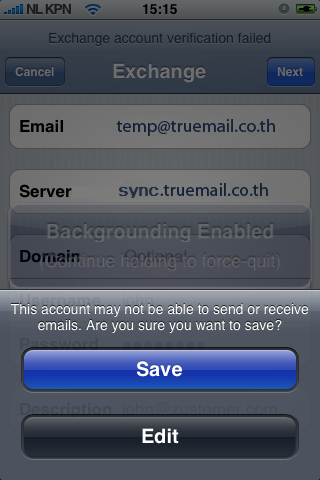
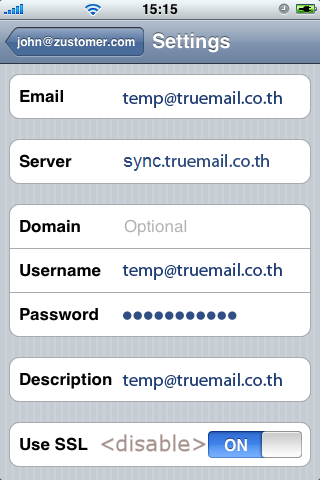
2.4.1.3. Set the sender address (from field)
It is possible to set the
FROM address of emails before they are sent. This field can be found above the
TO field, as shown in
Figure 2.10, “Selecting a from address”. When no address has been selected the default address is used.
Please note that the FROM field is only displayed when FROM addresses have been set in the E-mail.
E-mail-> Administation -> Accounts -> double-click account name -> Manage sender aliases
Please contact the systems administrator, if the following (bounce) message is returned when sending from a different sender adress: You are not allowed to send as the given user.
Since TrueMail Webmail two kinds of delegation are available:
Send on Behalf permissions: if a user grants the appropriate permission to another user, the latter can send items on behalf of the other user. In this case an email or meeting request will be sent with the following From field: “<delegate> on behalf of <user>”.
Send As permissions: if the system administrator gives the rights to user B to ‘send as’ user A, the receiver of an email will not see that user B sent an email. The receiver will only see user A in the From: field.
Before TrueMail Webmail, user themselves where allowed to “send on behalf of” by entering the other users inbox. By this method it was always explicitly visible who sent the email. For example: Pete enters the inbox of ‘info’ and sends an email as the non-active user ‘info’, would result in:
John_Smith@truemail.co.th on behalf of temp@truemail.co.th.
Since TrueMail Webmail it is possible to send emails as other users without the “on behalf of” part. Due to security reasons the new “send as” permission is only configurable server-side by the administrator. This setting can always be overruled by the user itself and the old “on behalf of” permission can still be set by the user.
Keep in mind that delegation always overrules impersonation. A user can always choose not to let another user impersonate as himself.
2.4.1.4. Saving an email to drafts
Saving an email is possible by clicking the Save (a floppy disk) icon. After saving the email, it is stored in the Drafts folder.
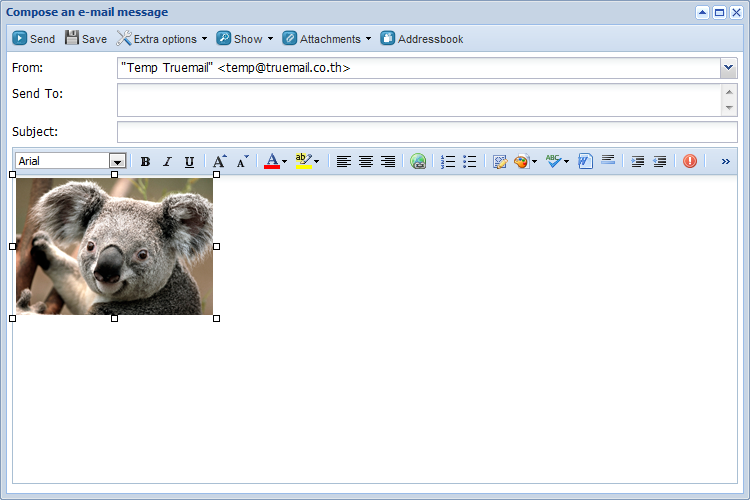
From TrueMail Webmail the WebMail has the ability to add inline images in mail messages. To add an inline image, click on
Attachments and select an image. If the ‘HTML’ format is being used (see
Compose mail in this format in
Settings,
E-mail tab), the use HTML markup functionality is enabled. A menu toolbars will appear below the subject as seen in
Figure 2.12, “Insert images icon to insert the image as a inline image”. Click on the blue cross icon to insert the image in the mail body as shown in
Figure 2.13, “Example of an Inline Image”. The inline image will inserted at the last cursor position.
To change the image size, right click on the image and resize
.
Figure 2.14, “Image resize” will appear which enables the user to customize width and height of the image.
It is possible to delete the inline image directly from the main body, as if it were text.
In some browsers it is possible to paste an image from your clipboard directly into the editor. This will embed the image into the source of the body and it means that it will not become an attachment. The image will be shown properly in Firefox and Internet Explorer 9, with limited support in Internet Explorer 8. In Outlook the image will not be visible properly.
2.4.3. Move and delete email
There are several ways to delete email. They are:
To move a single items it is most convenient to simply drag the item to its new location. Place the mouse cursor over the item to be moved, click and hold the left mouse button. Continue to hold the button down while moving the mouse cursor until it is over the folder the message needs to be placed.
Notice that the folder names under the mouse cursor are highlighted while moving. This highlighting marks the folder where the message will be placed when releasing the button.
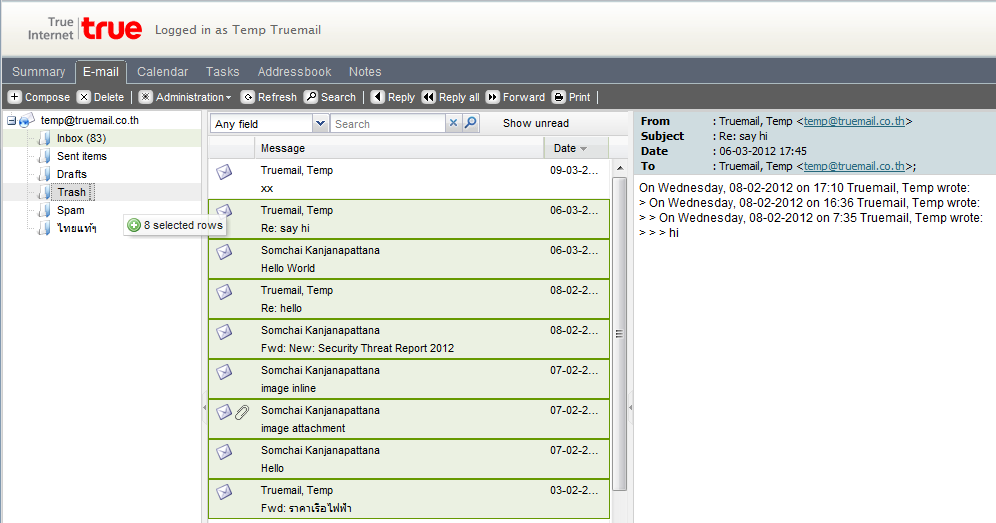
To move multiple items, first select all the items (only items that are currently visible can be moved). To select a range of items click on the first item and then press and hold the shift button on the keyboard. Before releasing the shift button, use the mouse to click on the last item in the range that needs to be moved. All items between the two items clicked on will become highlighted.
With items that are not consecutive, hold down the control (Ctrl) button on the keyboard while clicking on each item. To drag and drop these items, release the control button, place the mouse cursor on one of the selected messages, drag them into the designated folder.
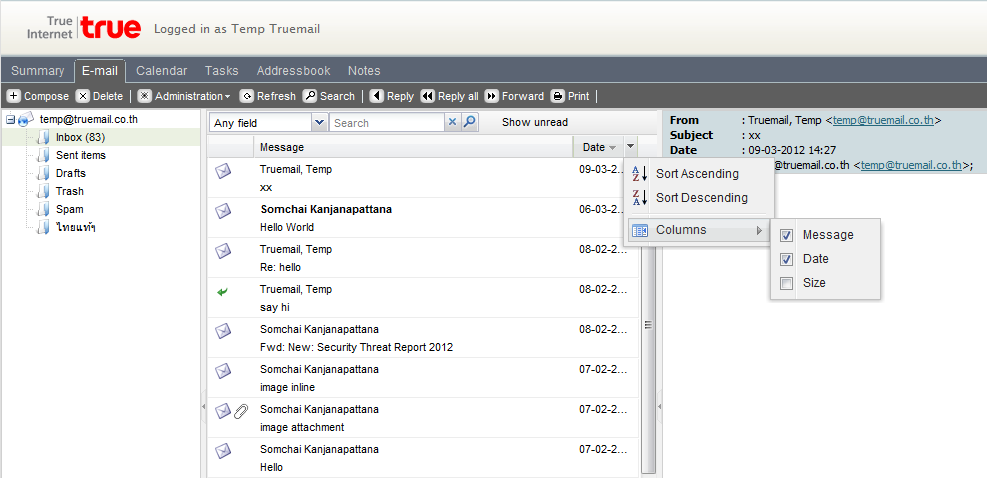
2.4.3.3. Change email view
In the TrueMail Web Access, the email view has a default layout: a list of messages with a
From and a
Subject colomn. However, it is possible to change the view by adding or removing columns. To do so, use the right mouse button to click on the header of the list (for example on the
From header field) and select the
Field Chooser option from the context menu. A dialog that looks like
Figure 2.17, “Field Chooser” will pop up.
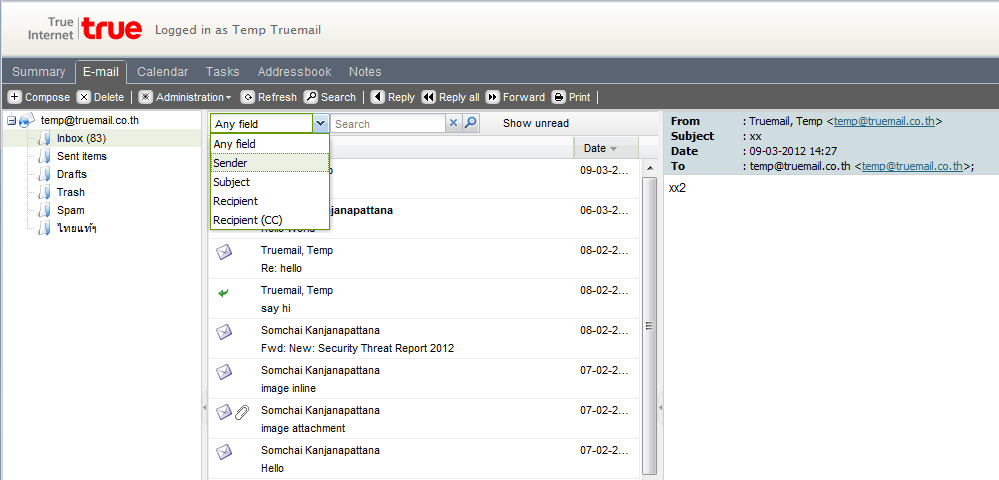
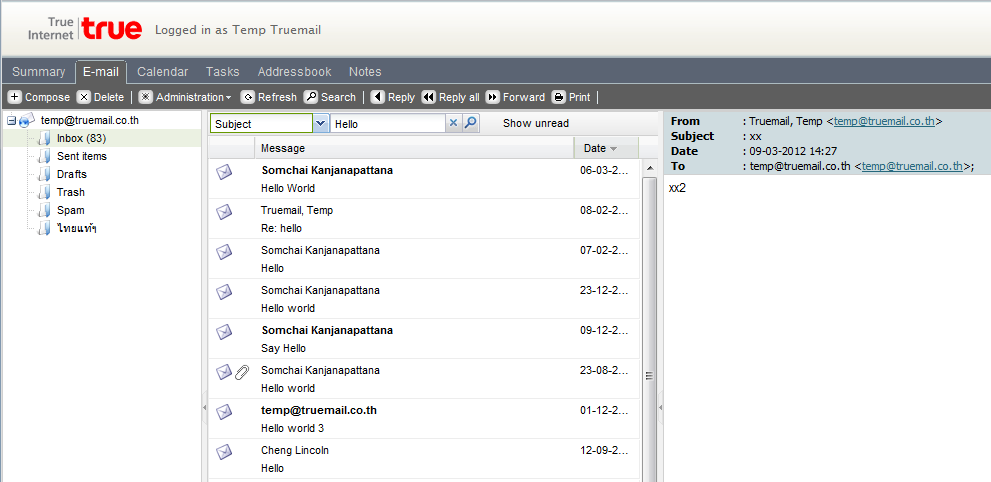
To search click the
Search button in the tool bar. A seach bar (see:
Figure 2.21, “Searching Options”) will then be added to the WebMail view (to remove the search bar, click the
Search button again).
The seach bar allow a user to enter a search query and choose where to search. For example if a user remembers just a part of a message’s subject he can select
Subject from the pull down menu. After the query is keyed in the user should click the
Search button (binoculars icon) on the seach bar, or press the enter on the keyboard. As shown in
Figure 2.22, “Search Result”, the email list is updated with the results of the search query.
When finished searching press the Stop button (X icon) to return to the normal list view. To remove the search bar click the Search button in the tool bar again.
2.4.5. Downloading Attachments
Attachments can be downloaded one by one, by right-clicking the attachment and selecting
Save target as. From TrueMail Webmail, it’s possible to download all attachments from a message at once, in a compressed ZIP file, by clicking the
Download all as zipfile button, as seen in
Figure 2.23, “Message Attachments”.
2.4.6. Attach items to mail
To add items as attachments or forward them as text message in body of composing mail.
You must click Upload files button for upload files from your PC to WebMail.
Browse through the message list and select the items need which to be attached.
Items can be attached as Text or as Attachment, By selecting the check box as required, by default, items are added as Attachments.
Attachments in the original e-mail are not forwarded with the new text message.
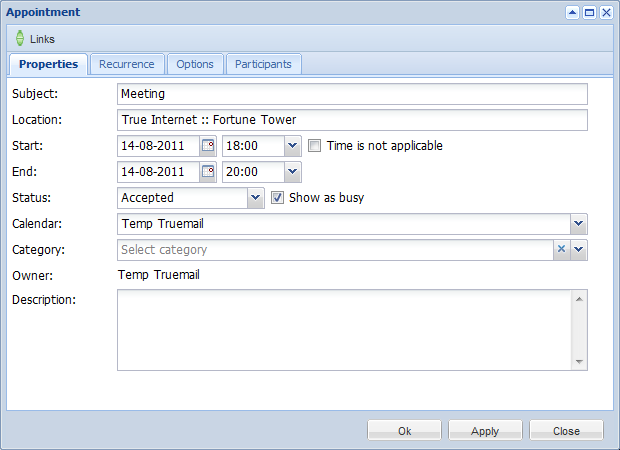
2.5.1. Create new appointment with invitations and free/busy status
Select the folder Calendar.
Insert a subject for the appointment, and optinally a location.
Select a start and end time for the appointment.
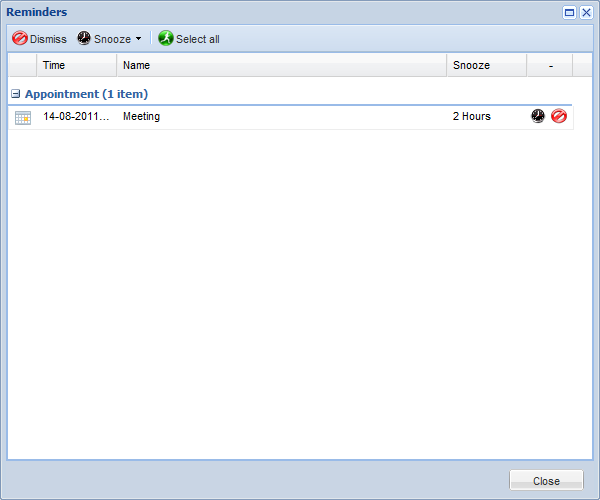
Optional: Enable the reminder option, this will trigger a reminder pop-up (see:
Figure 2.27, “Reminder dialog”) before the appointment starts. The time interval between the reminder and the appointment is adjustable in the field next to the reminder option. When it is time for the reminder to pop-up, the TrueMail Web Access shows a list of these reminders with buttons to
Open the item,
Dismiss the item,
Dismiss All items or to
Snooze the reminders by a given time.
Pop-up windows need to be allowed by the browser to see reminder pop-up windows. Often this needs the domain name of the TrueMail Web Access to be whitelisted for pop-up windows in the browser.
-
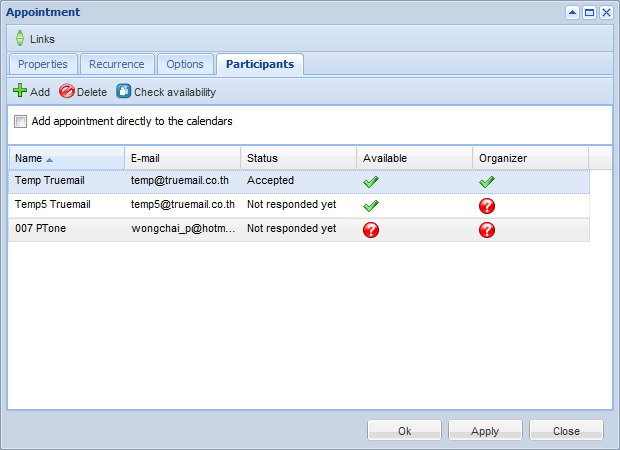
Using the button Participants
one can send a meeting request as shown in
Figure 2.28, "Meeting request". The attendee will receive a meeting request which the attendee can
Accept, accept as
Tentative or
Decline, alternatively the attendee can also
Propose New Time for that request.
- Add the User from Corporate Addressbook shown in Figure 2.29, “Add user from Corporate Addressbook”. And add the User from Personale Addreesbook show in Figure 2.30, "Add user from Personal Addressbook"
Corporate Addressbook will show only who ever sign on to webmail
-
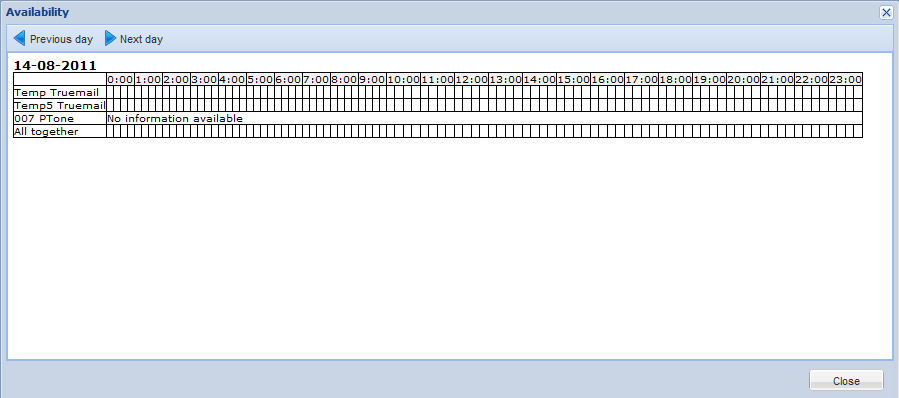
By opening the tab
Scheduling, the free/busy times for multiple people are shown (see:
Figure 2.31, “Scheduling/FreeBusy”). On this tab colleagues can be invited (
Add a name); an overview is showing exactly when a specific person is busy, out of the office, or available. If an attendee has proposed a new date or time for a meeting, the proposals are shown on the
Scheduling tab as well.
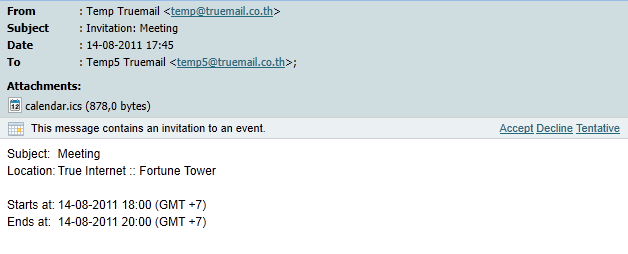
2.5.2. Accept a meeting invitation
If someone invites you for a meeting, you will receive meeting invitation. At the top of the invitation a bar containing the buttons
Accept,
Tentative,
Decline and
Propose New Time is shown for sending a response to the owner of the appointment. See
Figure 2.32, “Meeting invitation buttons”.
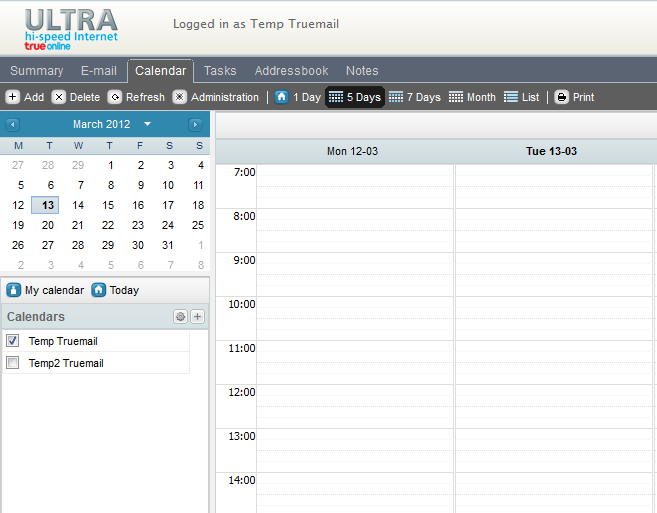
2.6. Multiple calendar views
The TrueMail Web Access calendar has four different views:
Day view
Workweek view
Week view
Month view
Views can be switched via the four buttons in the tool bar.
The date picker is used to move the view to another day/week/month, which is at the top right of the screen when the calendar is opened.
2.6.1. Move/delete appointment
2.6.1.1. Move appointment
An appointment can be moved to another time/date by selecting the item and dragging it to the new date and time. Alternatively, (for instance if the new date is not in the current view) an appointment can be opened (either by double clicking on it or by right clicking on it and choosing the Open option), which presents a dialog where the new date and time can be set.
2.6.1.2. Delete appointment
Appointments are deleted by the delete button in the context menu that shows when clicking on an appointment with the right mouse button. Alternatively, one can use the Delete button in the tool bar, or the Del/Delete key on the keyboard.
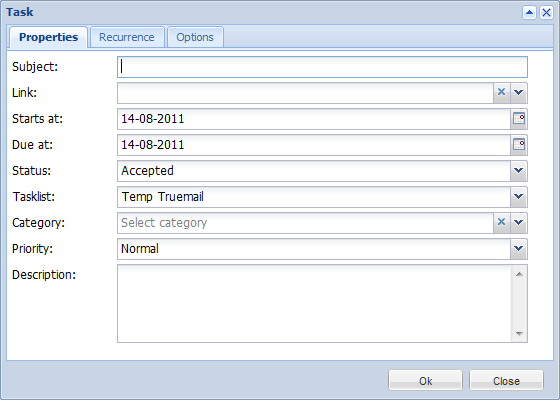
In the task folder a to-do list can be created and managed. A task is created with the following steps:
Fill in the preferred fields. The fields in this window are comparable with those in the New Appointment dialog.
-
Use the Ok button to confirm. The task can now be found in the task overview
2.7.1. Recurrence in Tasks
2.7.1.1. Add/Change Recurrence in a Task
Only the owner of a task can change the task in a recurring task.
Select the frequency (Daily, Weekly, Monthly, Yearly) of recurrence.
To specify when the task repeats, do one of the following:
Repeat the task at regular intervals: Click on options given on the right-side of Recurrence pattern to recur the task on specific intervals
Repeat task at interval after the date it is completed: Click Regenerate new task and fill the interval in the box.
Recurring tasks appear one at a time in the task list. When user marks one occurrence of the task complete, the next occurrence appears in the list.
2.7.1.2. Remove Recurrence from a Task
Open the recurring task
Click Recurrence from menu in task dialog.
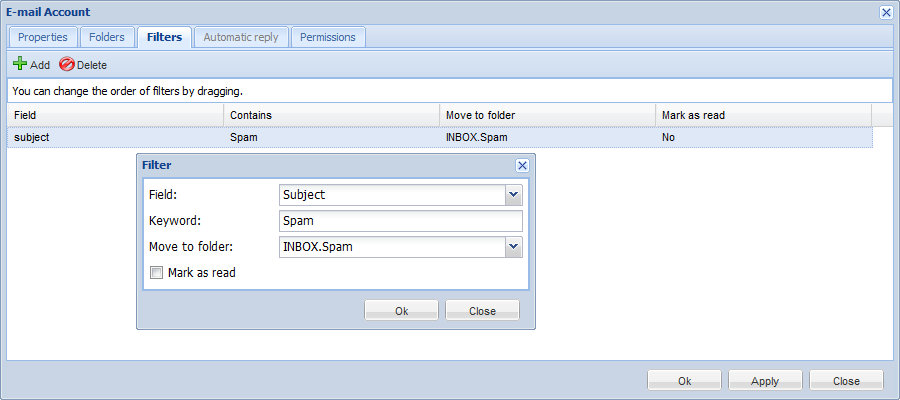
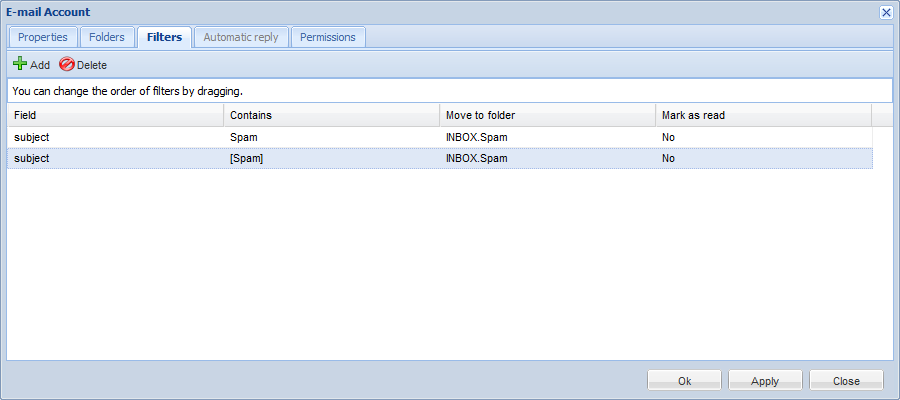
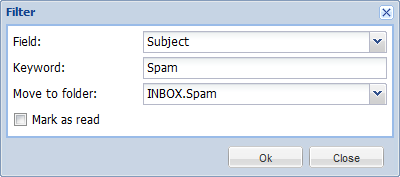
Filter automatically perform actions on incoming messages based on certain criteria, they can move the message. When a message is deliverd the rules are applied directly on the TrueMail Server, so a user does not have to be logged in to execute the rules.
To create or edit rules, go to:
E-mail -> administration -> Accounts -> Double click account row -> Filters
(see:
Figure 2.55, “Filter e-mails”).
To create a new rule, click the
New button in the
Filter dialog. The dialog as shown in
Figure 2.57, “Add/edit filters dialog” is presented. This is the same dialog as the dialog for editing filters which is opened by selecting a rule from the
Filters dialog and double clicking the
filter name.
In the Filter name field a short description of the rule — to identify it in the filters overview dialog — can be provided. Below the Filter name field the criteria of the rule are specified. The incoming message can be matched by sender address, by subject, by from, by the recipient address.
When finished close the dialog by clicking the Ok button. To save the rule, the Filters overview dialog must also be closed by clicking Ok.
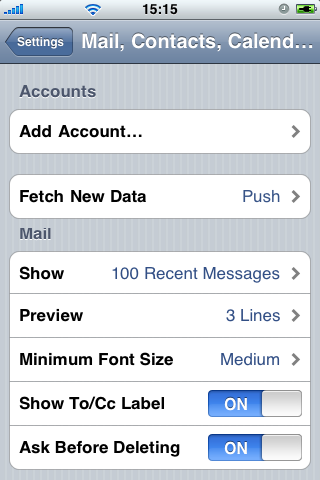
In the bottom-right corner of the TrueMail Web Access, to the left of the log out link, resides a settings link by which the Settings dialog can be opened. The follwing sections cover each of the tabs.
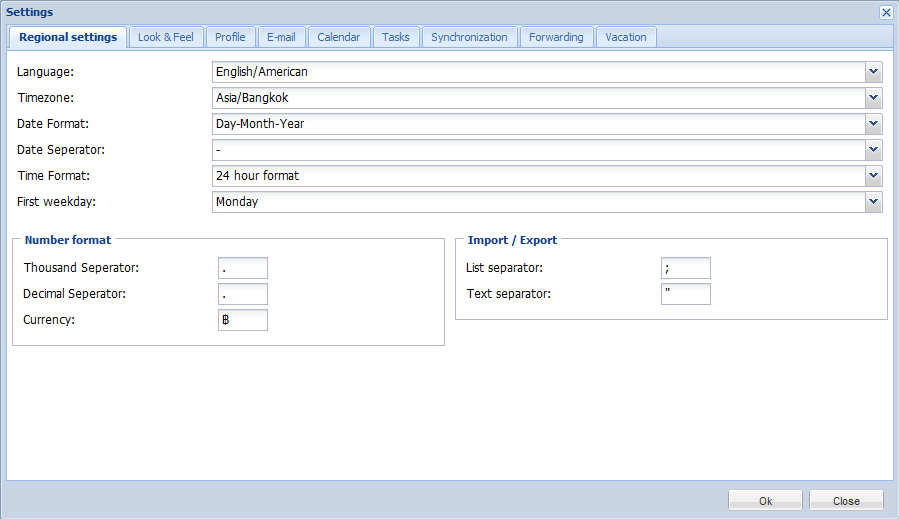
2.10.1. The “Regional settings” tab
Language, sets the default language for the WebMail.
-
Timezone, set the timezone that locate in Calendar.
-
Date Format, set the date format for the WebMail.
-
Date Seperator, set the seperator for date, month and year.
-
Time Format, set the format of time for display in WebMail.
-
First weekday, set the day for first of week in Calendar view.
-
Thousand Seperator, set the sperator for thousand
-
Decimal Seperator, set the sperator for Decimal
-
Currency, set the sign of currency
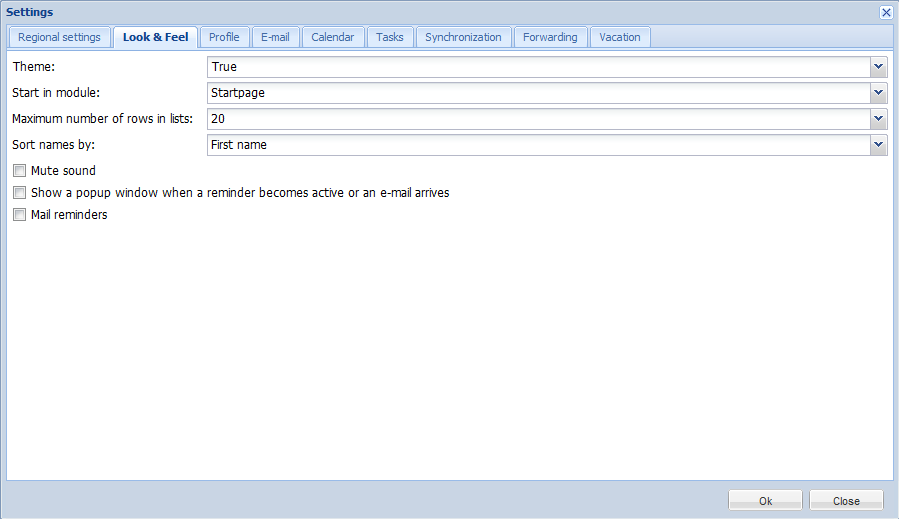
2.10.2. The “Look & Feel” tab
-
Theme, the display screen color.
-
Start in module, the first start view of Web Access
-
Maximum number of rows in lists, a email messages in the list view.
-
Sort names by, the display contact name.
-
Must sound, set when you don't want to hear sound.
-
-
Mail reminders, automatic send email message to you for calendar.
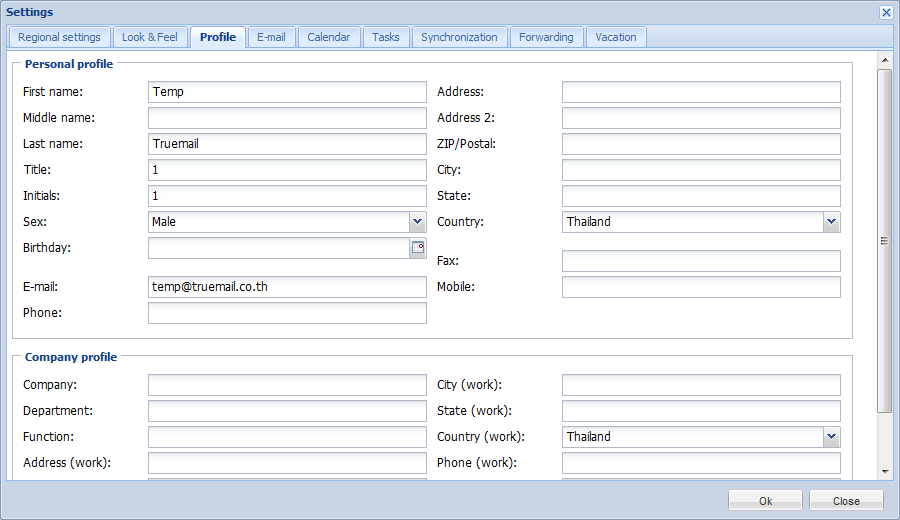
2.10.3. The “Profile” tab
-
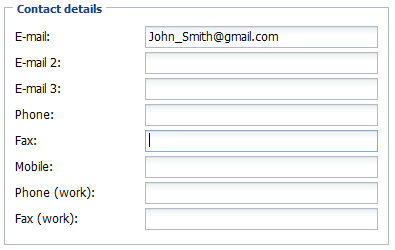
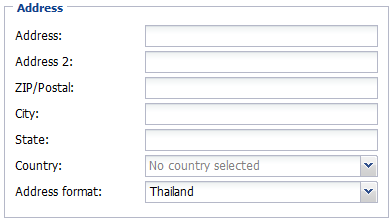
Prosonal, the personal information.
-
Company, the company infomation.
-
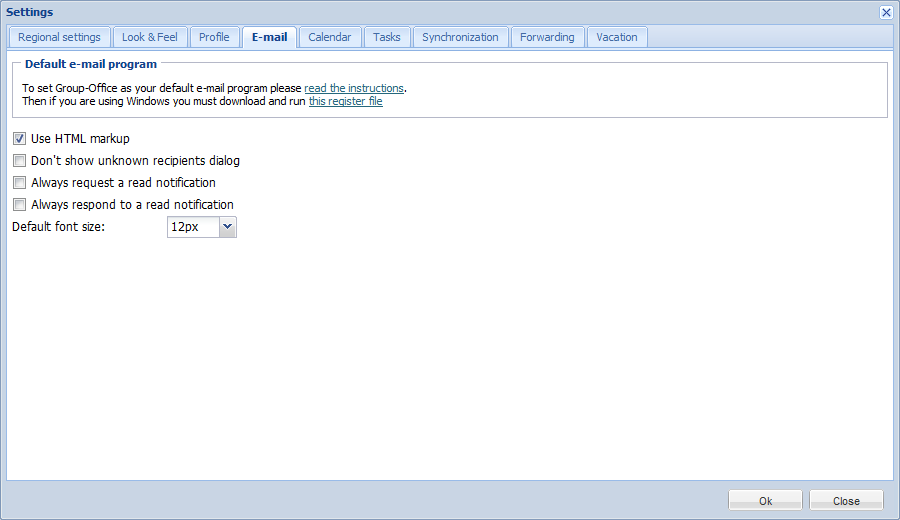
Use HTML markup, compose email with HTML format.
-
Don't show unknown recipients dialog, .
-
Always request a read notification, .
-
Always respond to a read notification, .
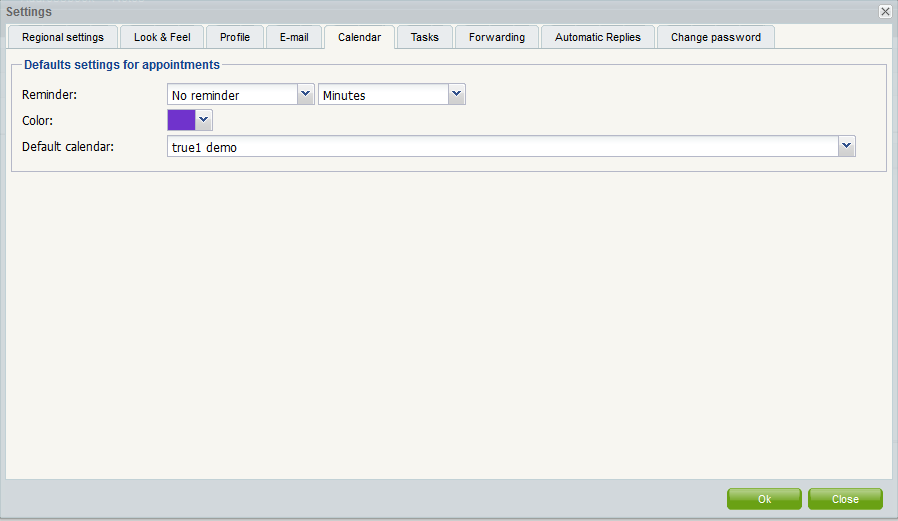
2.10.5. The “Calendar” tab
-
Reminder, how long before the appointment start the default reminder should occur.
-
Color, the color for your personal calendar.
-
Default Calendar, the default calendar for TrueMail Web Access.
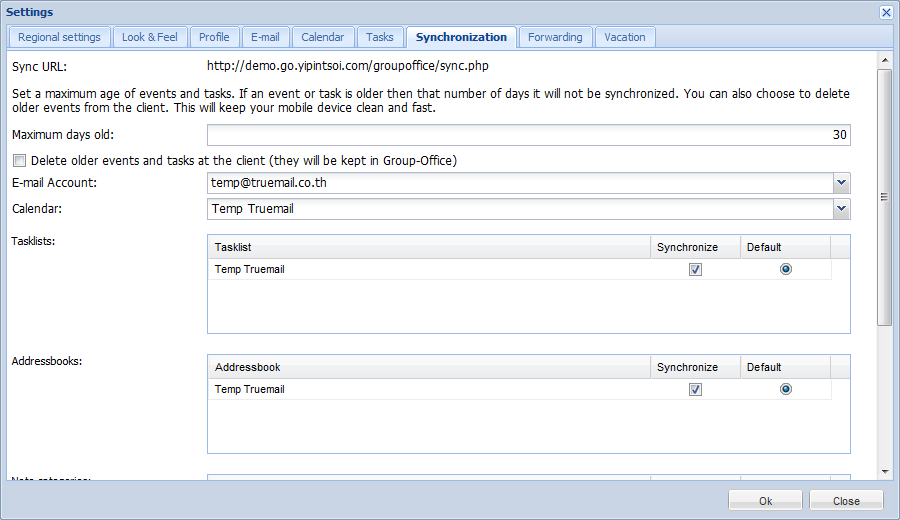
2.10.7. The “Synchronization” tab
Here you can control the addressbooks, tasklists and calendar to synchronize with. You can also enable the automatic deletion of events and tasks that are older then a configurable number of days. With this setting enabled all old events will be deleted from your phone but not from Group-Office. This way your phone stays clean and fast.
2.10.8. The "Forwarding" tab
Generically refers to the operation of re-sending an email message delivered to one email address on to a possibly different email address.
-
Enable forwarding, re-sending an email message.
-
Do not leave copy on server, you can not Enable this if Disable forwarding.
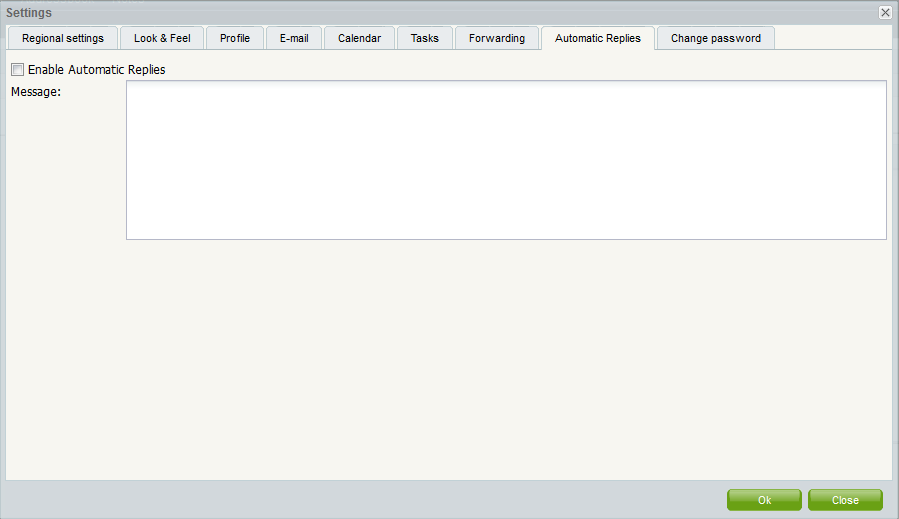
2.10.9. The "Automatic Replies" tab
When you're going to be away from your email for an extended period of time, you can use them to automatically reply to your incoming email to tell your correspondents that you're away, when you'll be back, and perhaps let them know who they can get in touch with for help while you're gone.